Originally published October 2024. Updated October 2025 with new information and resources.
IDOC and FAFSA Verification
Getting all of your financial aid forms completed and submitted is a major milestone. A lot of families use that moment to breathe a sigh of relief and turn their thoughts onto other pressing matters, as well they should. However, pressing “submit” isn’t the end of the story. Read on to find out what happens next and how to make sure you don’t miss it.
Reporting financial information is a big deal for a lot of families. It is the link between your student and need-based aid; even merit aid, in some cases. Your mind may deduce that someone unscrupulous could easily alter the numbers to put themselves in a more favorable light when it comes to receiving financial aid. After all, what’s to stop them from doing it? Well, a moral code for starters, but failing that, many families are put through some type of verification process to substantiate their numbers. So, trying to cheat the system is NOT recommended.
This verification can be divided into the following categories.
- FAFSA Verification – If you just hear the term “verification” alone, it may be someone referring to the process by which schools confirm financial and other data submitted on the FAFSA form.
- IDOC – The College Board has their own way of collecting documents for verification of information submitted on the CSS Profile, which is used by many schools.
- Other – Colleges and universities have the flexibility to use any financial aid form they like and verify that information using a process of their choosing. So, you may apply to a school that has some other way of verifying your information.
Since one of the primary items that may be verified is your income as reported on your tax return, when completing financial aid forms, go ahead and request or access your free tax transcript from the IRS.
Learn more about the verification process: FAFSA Verification Simplified
FAFSA Verification
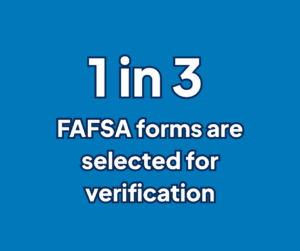
In recent years, around one in three students’ FAFSA forms have been selected for verification, so if it happens to you, don’t panic, and don’t worry that you’ve done something wrong. There are many students in the same boat as you, having to submit extra documentation to support their FAFSA entries.
How Will You Know You’ve Been Selected?
There are two ways to find out that your FAFSA application has been selected for verification.
- Check your SAR (Student Aid Report) regularly by logging into your FAFSA account using your FSA ID (or username and password). If you have been selected to verify information by one or more schools, there will be an asterisk next to your SAI (Student Aid Index). Follow the instructions given to you by each school.
- After completing your FAFSA form and school applications, check your email and other points of communication (like an application portal) with each school often, at least weekly, for updates from the school. They may communicate with you that way to let you know you need to submit documents for verification.
I’ve been selected – now what?
- Put the verification due date on your calendar along with a reminder or two prior to the due date to make sure you don’t forget about it. You will not be considered for Federal student aid without completing your verification.
- Submit the documentation requested as soon as possible so you can check it off of your list.
- Check back with the school to make sure they have everything they need.
IDOC

The College Board uses a secure portal called IDOC to collect documents and forms verifying the information submitted in the CSS Profile. Currently, about 100 institutions use this way of verifying data. One nice feature applies to students who have been chosen for verification by multiple institutions that use IDOC. In that case, those students need only upload documents once. However, there may be institution-specific forms that would also need to be uploaded for each individual school.
How Will You Know You’ve Been Selected?
If a school has chosen to verify your information using IDOC, you will be notified by the College Board and, possibly, by the school as well. For this reason, you should be checking your emails, school portals, and College Board account regularly.
Not everyone needs to sign up for IDOC, only those students who have been notified by a school to do so. If you are being requested to submit information, you should expect to receive a link and log in instructions. Keep this email as it contains information you will need when setting up your account.
I’ve been selected – now what?
- Using the email you received from the College Board, go to IDOC and create your account.
- Review the list of documents and forms needed along with their due dates. Enter these deadlines along with a couple of reminders on your calendar to make sure you don’t forget.
- Locate and upload all documents and signed forms into the system as soon as possible.
- Verify with each school that they have everything they need.
Tips For Using IDOC
Be sure to verify and update the information in the Family Information Section before getting started. If you need to update or correct family information you can go to “Learn or do more,” “Update Family Information”.
For submitting a tax return – include a signed copy of your tax form and all schedules. Do not include worksheets or a cover sheet.
To locate forms specific to a particular institution, go to “Learn and Do More” on your home page and select, “Get Forms.” The forms will be identified with the name of the relevant institution. In most cases, you’ll need to print, sign, and upload these forms.
For documents that need a signature, you will either be able to sign them electronically or print, sign and upload.
Don’t try to include multiple documents on a single scanned page.
Proper formats for upload are PDF, TIFF or JPEG and they should be no more than 9MB each.
Make sure that all forms can be easily and accurately read.
After being uploaded, it can take up to 5 business days for the documents to be reported as processed. Make a note on your calendar to check back at that time for confirmation that this has occurred.
For help, FAQs, and contact information, look at the options under “Learn And Do More.”
Other Verification Methods
You may very well be asked to verify your information using a method not covered in this article. In that case, communicate closely with the applicable institution to make sure you understand and complete all of the steps accurately, on time, and to their satisfaction.
Make Your Life Easier By Keeping All Of Your Information In One Place
As you start filling out school and financial aid applications, go ahead and start a file with a digital and physical copy of each record you utilize for source material the first time that you use it. Rest assured, your future self will thank you, and when it comes time to submit documents for verification, it will be much easier.
Simplify Your College Cost Planning
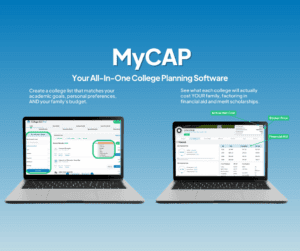
Before you even reach the verification step, you can know what to expect.
Use MyCAP to estimate your family’s real cost at each college, including scholarships, grants, and expected aid so you can compare schools confidently and plan ahead.
👉 Create a free account to see your personalized college costs in minutes.
FAFSA and IDOC Verification FAQs
What does FAFSA verification mean?
FAFSA verification is a process where colleges confirm that the financial information you submitted on your FAFSA is accurate. It’s not a sign of a problem, it’s a routine step for about one in three students.
How long does FAFSA verification take?
The timeline can vary by school, but once you’ve submitted all requested documents, it typically takes a few weeks to process. Submitting early and following up ensures you stay on track.
Who uses IDOC for financial aid verification?
Around 85 colleges and universities use the College Board’s IDOC system to verify data from the CSS Profile. If one of your schools participates, you’ll be notified by email or through your College Board account.
Do all students have to use IDOC?
No. Only students who are specifically asked to submit documents through IDOC need to create an account. If you’re not notified, you can skip it.
